Showing posts with label fun fold cards. Show all posts

Wednesday, May 28, 2025

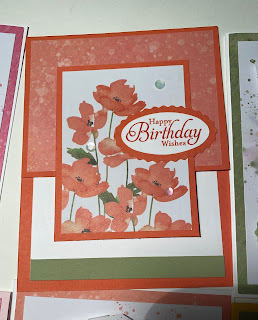
Country Flowers Tent Card

I just adored this card, inspired by fellow demonstrator Claire Ottaway from the UK. I had to update the measurements to make it easy to replicate here in the US but that was pretty easy...


To get a better idea of the "tent" design, here's a slight side view: 


And I guess I should have taken another photo more from the side so that you can see how the bouquet of flowers 'hangs' on the panel inside the tent fold! And also not very visible is that I placed an embossed  piece (embossed using the Brick and Mortar Embossing Folder) on the inside back of the hanging panel. Minor touches but nice to do with a special hand made card! Oh and there's a panel on the back with the flower bouquet stamped in the corner where I can write a personal message to the recipient.

Thanks for stopping by! Have an amazing day!

Tuesday, April 22, 2025

Happy Easter Bunny Chocolate treats & Easter Bunny card

I love making these little treats...they're so darned cute! I made them a few years ago but decided I had to do them again this year. I know I just missed posting in time for Easter but thought I’d still share these since Easter Monday was just yesterday. I just put one of these cuties at each place setting yesterday…how darling is that?


I found a wonderful tutorial on Pinterest by Wendy Lee (https://creativeleeyours.com/easter-blessings-treat-holder-printable-tutorial-maui-achievers-blog-hop/) but tweaked them a bit to conserve a bit of paper as I wanted to make a dozen of these! So the only thing I did differently was to make my strips 1” wide and that allowed me to make 6 treats from a 12x12 sheet of DSP.

Also late in sharing is an Easter card for some young ones using the Easter Bunny stamp set:


When you open the card, the front flap can rotate like this:


I love all the creative fun folds out there in Pinterest land! The daisy paper was from my stash way back during my scrapbooking days (decades ago!) and the daisy is the medium daisy punch from Stampin'UP! that retired a few years ago. I still use it often!

Thanks for stopping by…hope you had a nice Easter and have a wonderful day!

Tuesday, April 15, 2025

One More Year Dog Birthday fun fold book binding z-fold card

Humor is a funny thing, literally, and I usually avoid it because not everyone appreciates it, or perhaps not at the moment they receive the card. But this dog was just too cute! So I picked a new-to-me fun fold called the Book Binding Z-fold card and made this masculine birthday card:


Here you can see the view from the top which shows both the book binding design as well as the Z-Fold and someone brilliantly combined the two designs into one:

When you open the card, this is what you see;


And last but not least, this is how the card looks when standing...

Such a cute pup right? Thanks for stopping by & have a wonderful day!

Tuesday, April 1, 2025

Painted Petals - Paper Pumpkin alternate designs August 2024

Here I go again…getting a kit and loving it but…wanting to do my own thing with the components. To me, it’s not about making the most cards out of the kit (it usually makes 8 -10 cards) but mostly about doing something different with them. But this time, I did both and made 18 cards from the kit.

The Paper Pumpkin kit from August 2024 originally made 9 cards. But  by using the elements slightly differently than originally designed, I created 18 cards, 3 each of the following 6 designs:


Three of the designs use the identical sketch, using a front panel that is overlaid on the card front.  I love this design and use it often.  Here I've used different color schemes based on the printed focals:  


And the inside of each looks similar to this: 


The last 3 designs are based on the original plan for the cards in this Paper Pumpkin kit, with a few customizations of course: 


Thanks for stopping by. If you have this kit and haven't used it yet, I hope my cards inspire you to get the kit off the shelf and onto the crafting table. Have an awesome day!

Saturday, March 8, 2025

Bee My Valentine flip it cards


This is a throw back to last year’s adorable bee DSP and one particular card I designed with it. I die cut several bases, but didn’t get to finishing them all (I think I finished and sent one out),  nor did I post any. So this is kind of a throw back to last year, and yet not.

The Sizzix die set that I used to create these cards is likely a decade old if not older. I bought my first die cutter way back in 2013 and I’m guessing this was purchased shortly after that. I seem to pull it out every couple of years, make a card with it, then put it away for another rainy day!

This is a flip card …so as you open the card, the greeting “flips” or swings and you see the back side of it. 


And since you might want to write IN the card without it showing when the card is closed up, I affixed and extra piece of die cut white card stock inside:


Hope you enjoyed the little quasi throw back to last year! Thanks for stopping by & have a wonderful day!

Sunday, October 27, 2024

Halloween Wiper Card

 I have three young ones for whom I send special cards to: 2 great nieces and a great nephew. I try to make and send interactive cards, in other words,  cards that do something. This year I decided to make a wiper card and this is what it ended up looking like when closed:


And when opened, the oval with the "Boo" pops up from below and looks like this:


Hard to imagine the interactive aspect in still photos so here's a video: 


The mechanism is so simple and yet each time I make one, I have difficulty in putting the components together to make it work properly! Or my sentiment is the wrong size for the design! So simple and yet...mind boggling! LOL

This card folds up and fits into the standard A2 envelope. When you hold the top left side of the card in your left hand and the right side of the card with your right hand, you can pull the front panel sideways. And when you do, the "BOO" pops out from below! So much fun, or so I hope the kiddos will think!

Thanks for stopping by & have a wonderful day!

Saturday, October 12, 2024

Poised Peony Birthday Card

Aren’t peonies perfect for June birthdays? I did create and give this card away in June…just am super late posting! LOL 

The printed paper is from my local craft store as Stampin’UP! did not have any peony print paper at the time. And loving fun folds, I had to pick a design that was different.

And yes it folds flat to fit into an envelope:


Friday, June 7, 2024

Mountain View Fun Fold - Dainty Delight Birthday Card

I love making special fun folds for special birthdays and this one is no exception. I found a wonderful tutorial on Pinterest by France Martin (“Mountain View Fun Fold” dated Jan 9, 2023). Her examples didn’t include the paper I was using though and I changed it up a little inside as well.


Inside, I added some panels of embossed card stock and since I was traveling when I finished off the card, I was missing a stamp for “and”, so I had to draw that in using a blending pen and ink spot. Not happy with the way that turned out but, this is a handmade card after all and no one can dispute that! LOL Here’s the inside:


Please check out France Martin’s blog at  Frenchiestamps.com (search for “Mountain View Fun Fold”) to get the directions making this fun fold. It’s easier than it looks!

Thanks for stopping by…have a creative day!


Friday, May 10, 2024

Paper Pumpkin Alternates Memorable Meadow March 2024

I had a ton of fun playing with alternates with this month’s kit! I LOVED the daisy print and having the print on both the card front and back meant…cutting it into two and making double the number of cards! I decided to make these cards using the deckled circle dies:

The print was so pretty that I wanted to show it off and NOT cover it up. I loved picking a flower, die cutting it out and framing it with a slightly larger deckled circle in Fresh Freesia to highlight it:


Then I framed the entire print with a layer of Fresh Freesia. The sentiment is from the stamp set in the Paper Pumpkin kit and I tried stamping it with various ink colors and finally settled on heat embossing it in white:


Next, I decided to make some book binding cards and created these:


The following photo shows the card off better so that you can see why it’s called a book binding card design:


And I always embellish the inside of my cards with a stamped image or a scrap of DSP:


And another alternate design I created was a basic easel card and here’s the card closed:

And here’s the card open and propped up:


And a view of card from the side:


I loved this pairing of sentiments from the Lazy Days stamp set and thought it did justice to the beautiful daisies!

I also created a card using the gates from the New Horizon dies but need to take photos of them!

So I’ll end this here for now and hopefully will update it with additional alternates. 


Sunday, March 31, 2024

Zany Zoo/Zoo Crew Thank you to a knitter

There’s a super fun DSP (Designer Series Paper) paper pack called Zoo Crew which is part of the Zany Zoo Suite with stamps and corresponding dies.  Recently, I created a thank you card for a special knitter friend. The knitting llama was just perfect! I decided on a bridge card and here’s the final card:


If you’re not familiar with a “bridge” fun fold card, this is a top view of it, which makes the “bridge” and design of the card clearer: 


I used several products, retired and current for this card! First and foremost is the seated llama who is knitting. It’s from the Zoo Crew DSP pack and yes I had to fussy cut it out with my paper snips.  But it’s so worth the time and effort to fussy cut! 

The card base is Balmy Blue card stock 8 x 4.25” and I’ve used two patterns from the Bright and Beautiful DSP pack as the back ground of this card.  The “bridge” is made from one of the Nested Essential Dies and cut from Petal Pink cardstock. 


The sentiment is from the Flowering Flowers cling stamp set (stamped in Poppy Parade ink) and the heart is punched from the Bee Builder punch. 

The card needed something more for a  back drop behind the knitting llama so I used the window die from the Welcoming Window bundle and the tree/scenery from the Happy Home set from many years back! Here’s a close up of the window:


And a close up of how it looks with the window “behind” the llama:

And because there was no space to even sign this card on the front, I added a Basic White panel on the back side.

I had a ton of fun pulling in various sets that I have to make this card. I hope you enjoyed my run down of how it was made. The various items used to create this card (much older items excluded) are listed below. Thanks for stopping by. Have a wonderful day!


Supplies & Tools used:

-Zoo Crew 12”x12” DSP #161304 

-Balmy Blue cardstock 8.5x11” #146982

-Petal Pink cardstock 8.5x11” #146985

-Nested Essential Dies #161597

-Poppy Parade Classic Stampin’ Pad

-Bright and Beautiful 6x6 DSP #161449

-Welcoming Window dies (retired)

-Flowing Flowers cling stamp set (retired)

--Happy Home cling stamp set (retired)

Tuesday, February 13, 2024

Bee My Valentine interactive rocker card & lollipop treat

Happy Valentine’s Day! Once my daughter was out of elementary school, Valentine’s Day was no longer much of a “holiday”…no kid treats to prep, no valentines to write for everyone in the class, no class party! Sure we *could* do something, and we usually did a little something…but nothing much. Recently I’ve started doing a little more by making cards, decorating treats with cute packaging and such. 

I usually can resist a Valentine stamp set but the bee set in the current mini catalog just called and called to me. It is pretty darned cute! And I have to admit to having had a lot of fun with it. I realized that I sent off a BUNCH of flip it cards and forgot to take photos of them! Again! (A flip it card has a funky fold in the middle and a partial cut out that rotates as you open the card. Sorry, it’s hard to grasp in words and I need a video to show the neat design.)  But I did take photos of the cutest rocker card:


The bases were made using the Deckled Circles dies and Real Red card stock, as well as the Bee Mine DSP. After lots of stamping on some Basic White card stock and …voila, here’s a darling card! I created it with the “You’re as sweet as honey” stamp so that the ladies in class could stamp the back panel with “thanks so much”  as the cutest darned thank you card OR with a Happy Valentine’s Day stamp! I’m not able to load a video…not sure why but it’s a bummer as it shows off the card’s “rocking” feature. So cool! I sent this off card to my great nieces and great nephew…I hope they liked it!

Thanks for stopping by…and have a wonderful happy valentines day.


Wednesday, February 7, 2024

Magical Meadow Birthday Circle Easel Card

There’s a *beautiful* Designer Series Paper pack called Winter Meadow with six different beautiful prints with soft watercolor foliage! There is a corresponding stamp and die set called Magical Meadow too. Don't laugh.....but I tried to resist buying it for the longest time! And then I caved in (of course) as Pinterest kept showing me all the gorgeous cards made with the paper pack alone, and even more designs with the corresponding stamp set. 

Most recently, Pinterest presented several renditions of easel cards using this set and the Deckled Circles dies. So I decided to make a special birthday card using it. 

For the card base, I laid the largest circle die that would fit in an A2 envelope (approximately 4") on a folded piece of Lost Lagoon but moved the die so that the top part of the circle on the fold would not get cut off but both pieces would remain attached by a half inch or so. I then folded just the top layer of the circle in half so that the bottom of the circle reached the top of the fold where the circles attached and then reversed the fold so that it would fold under instead of over. Then I opened the card again to lay flat.

Next I cut another circle of the same size also out of Lost Lagoon and glued it only to the lower half circle I had just folded on the card base. 

Then came the layers of Berry Burst then the DSP, in incrementally smaller sizes of the Deckled Circles.

The card front was stamped with "Winter Wishes", which is a sentiment in the corresponding stamp set. 

Inside, I used the sentiment from the "Friendly Hello" set and popped it up using foam dimensionals to be the "stopper" for the easel card. Here's the card opened like an easel:


I also made a second card at the same time, but sent it off without photographing the finished product. I stamped the greeting on a label and added it to the center of the card front, embellishing the front with some greenery cut from vellum so as to not block the pretty DSP print. 


Hoping you love this card as much as I do! I still have DSP left to make more...LOL

Thanks for stopping by. Have a wonderful day!


Under the sea slider birthday card

A special young lady turned 6 a few days ago. And she's totally into axolotls right now.  So I created this card for her with a slider m...